Email Marketing Dashboard
Complete Training Manual for Administrators
Table of Contents
1. Logging In (Magic Link)
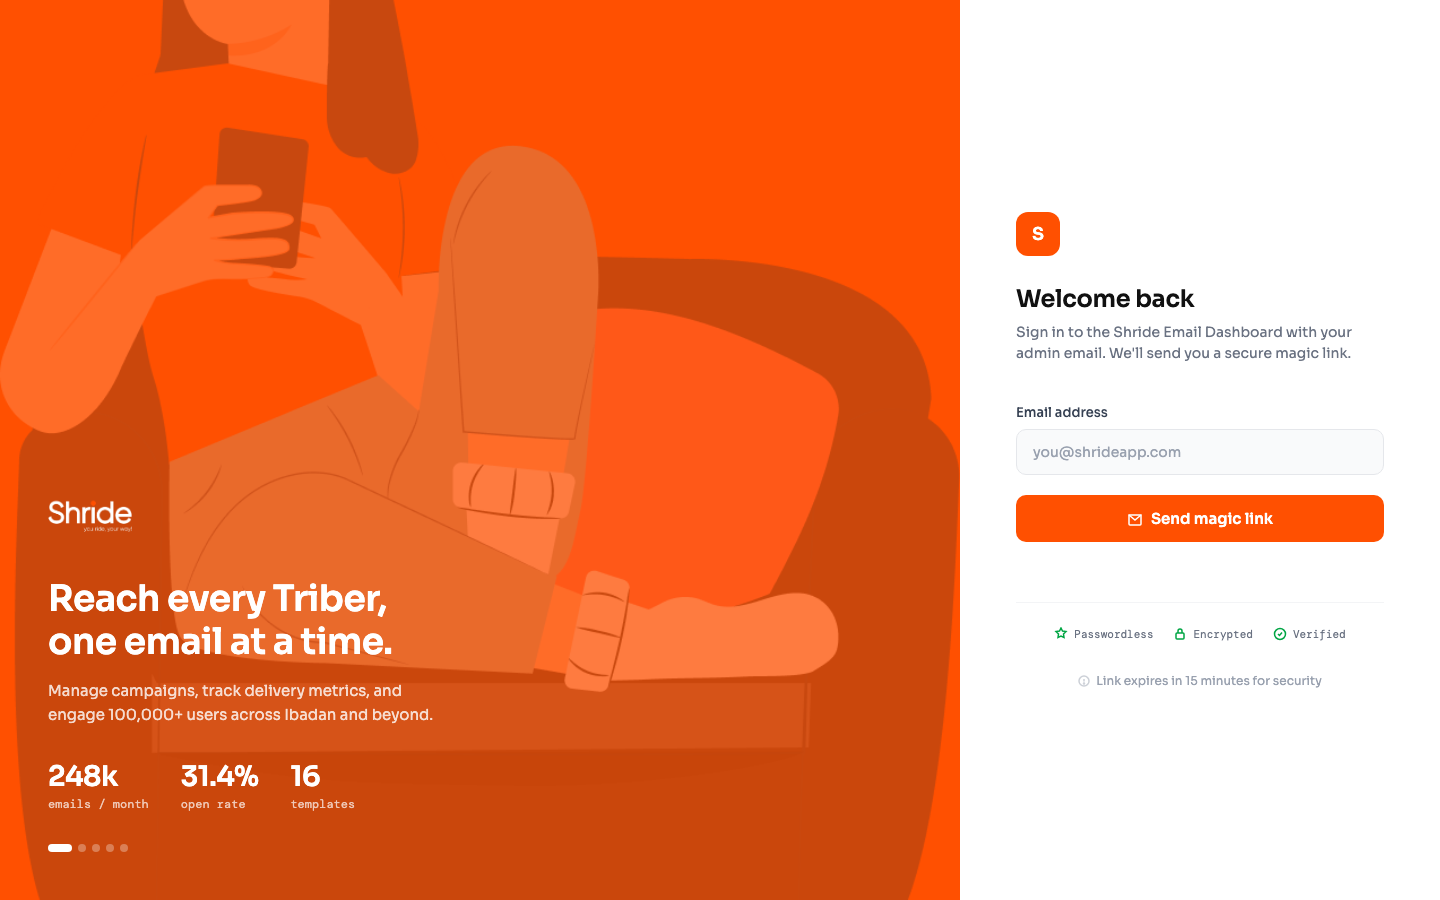
The Sendly Email Dashboard uses passwordless authentication. Only authorized admin emails can access the dashboard.
Authorized Admins
| Role | |
|---|---|
| admin@yourdomain.com | Super Admin |
| peacemarkhammed@gmail.com | Super Admin |
How to Log In
Logging Out
Click the "Sign out" button at the bottom of the left sidebar, below your name and role.
2. Dashboard Overview
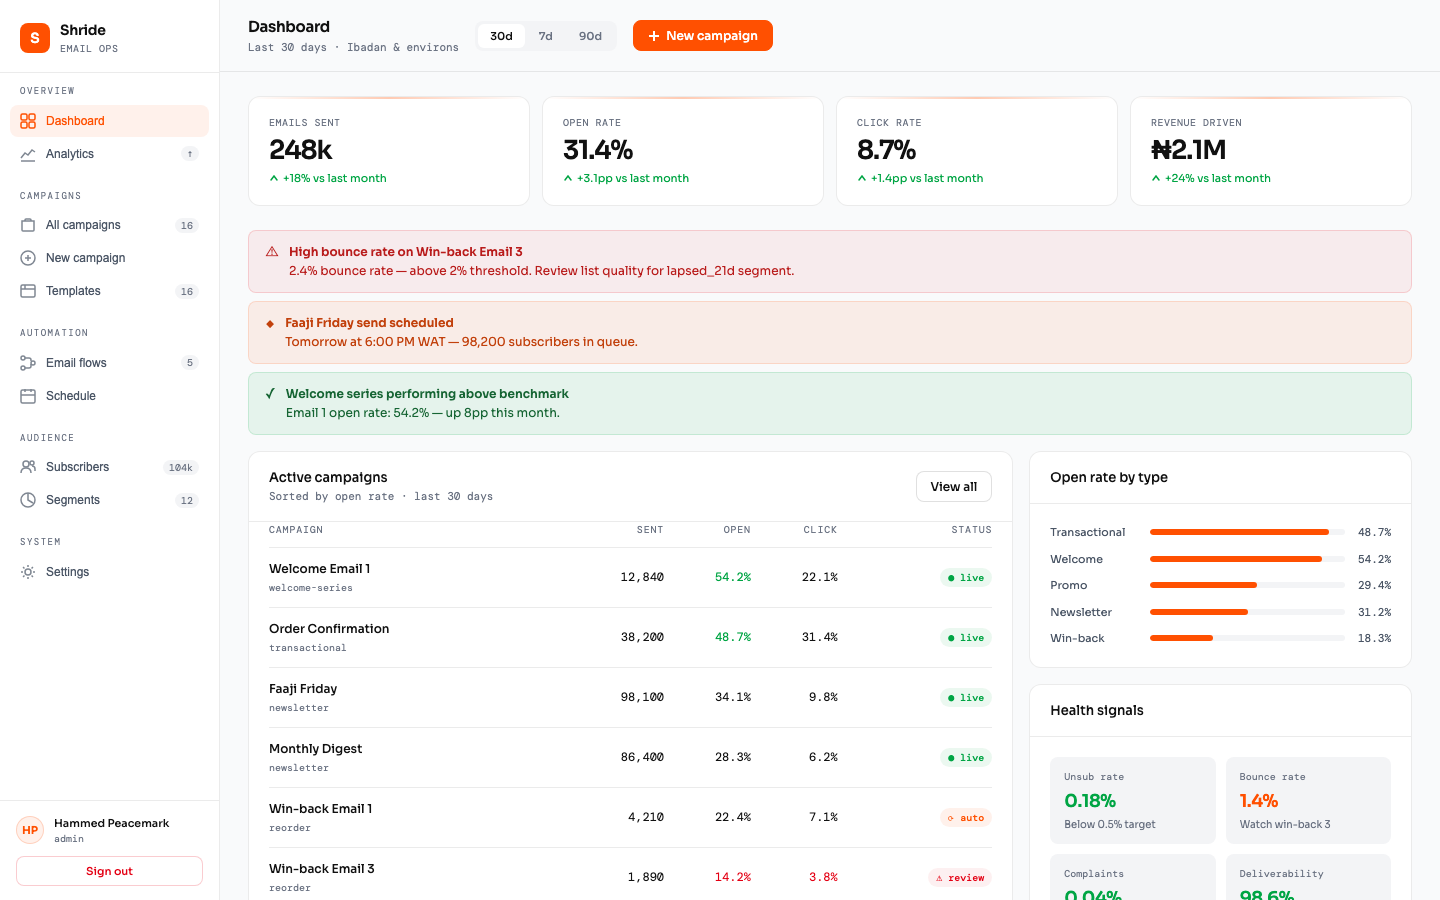
The main dashboard shows a snapshot of your email marketing performance over the last 30 days.
Key Metrics (Top Cards)
| Metric | What It Means | Good Target |
|---|---|---|
| Emails Sent | Total emails sent in the period | Growing month-over-month |
| Open Rate | % of delivered emails that were opened | 25%+ (transactional: 40%+) |
| Click Rate | % of delivered emails where a link was clicked | 5%+ (transactional: 10%+) |
| Revenue Driven | Estimated revenue attributed to email campaigns | Growing |
Alerts Section
Below the metrics, you'll see color-coded alerts:
| Color | Meaning | Action |
|---|---|---|
| Red | Critical issue (high bounce rate, complaints) | Fix immediately |
| Amber | Upcoming events or warnings | Review and prepare |
| Green | Good news (performance above benchmark) | No action needed |
Active Campaigns Table
Shows your running campaigns sorted by open rate. Each row shows: campaign name, type, emails sent, open rate, click rate, and status.
Health Signals
Bottom-right panel shows deliverability health:
| Signal | Target | Alert If |
|---|---|---|
| Unsub Rate | < 0.5% | > 0.5% per send |
| Bounce Rate | < 2% | > 2% |
| Complaints | < 0.1% | > 0.1% |
| Deliverability | > 98% | < 95% |
Time Period Toggle
Use the 30d / 7d / 90d buttons at the top to switch between time periods.
3. Managing Campaigns
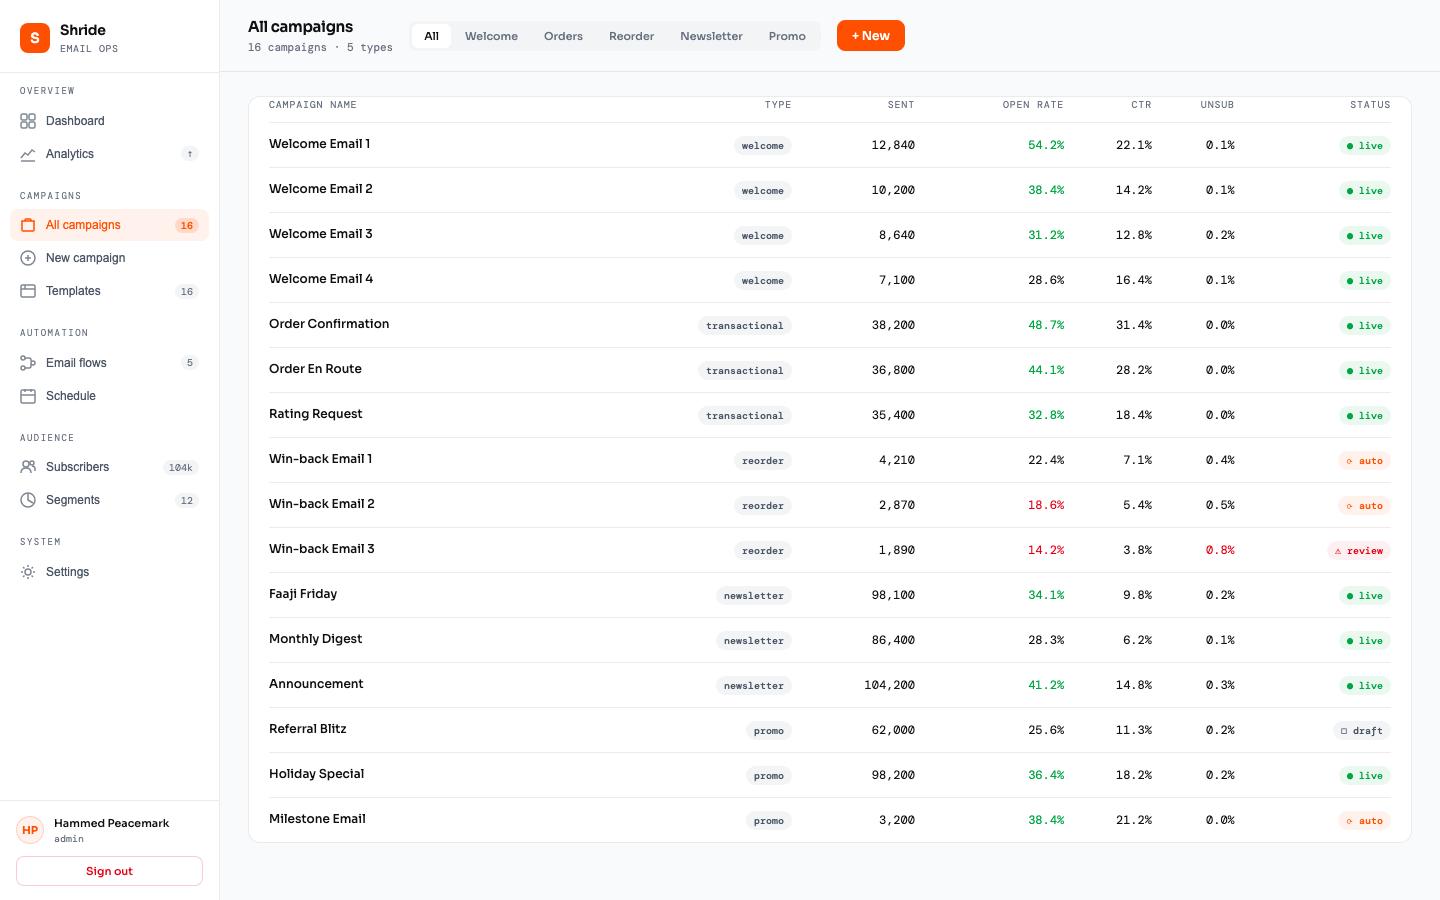
Go to All Campaigns in the sidebar to see every campaign.
Campaign Types
| Type | Description | Trigger |
|---|---|---|
| Welcome | 4-email onboarding series | User registers |
| Transactional | Order confirmation, delivery, rating | Order events |
| Reorder | Win-back series for inactive users | Daily cron (7/14/21 days) |
| Newsletter | Faaji Friday, Monthly Digest, Announcements | Scheduled/manual |
| Promo | Holiday, Referral Blitz, Milestones | Manual or milestone events |
Campaign Statuses
| Status | Meaning |
|---|---|
| live | Active and sending |
| auto | Automated (triggered by events) |
| draft | Not yet sending |
| review | Needs attention (high bounce/complaint) |
Filtering
Use the tabs at the top (All, Welcome, Orders, Reorder, Newsletter, Promo) to filter campaigns by type.
4. Email Templates
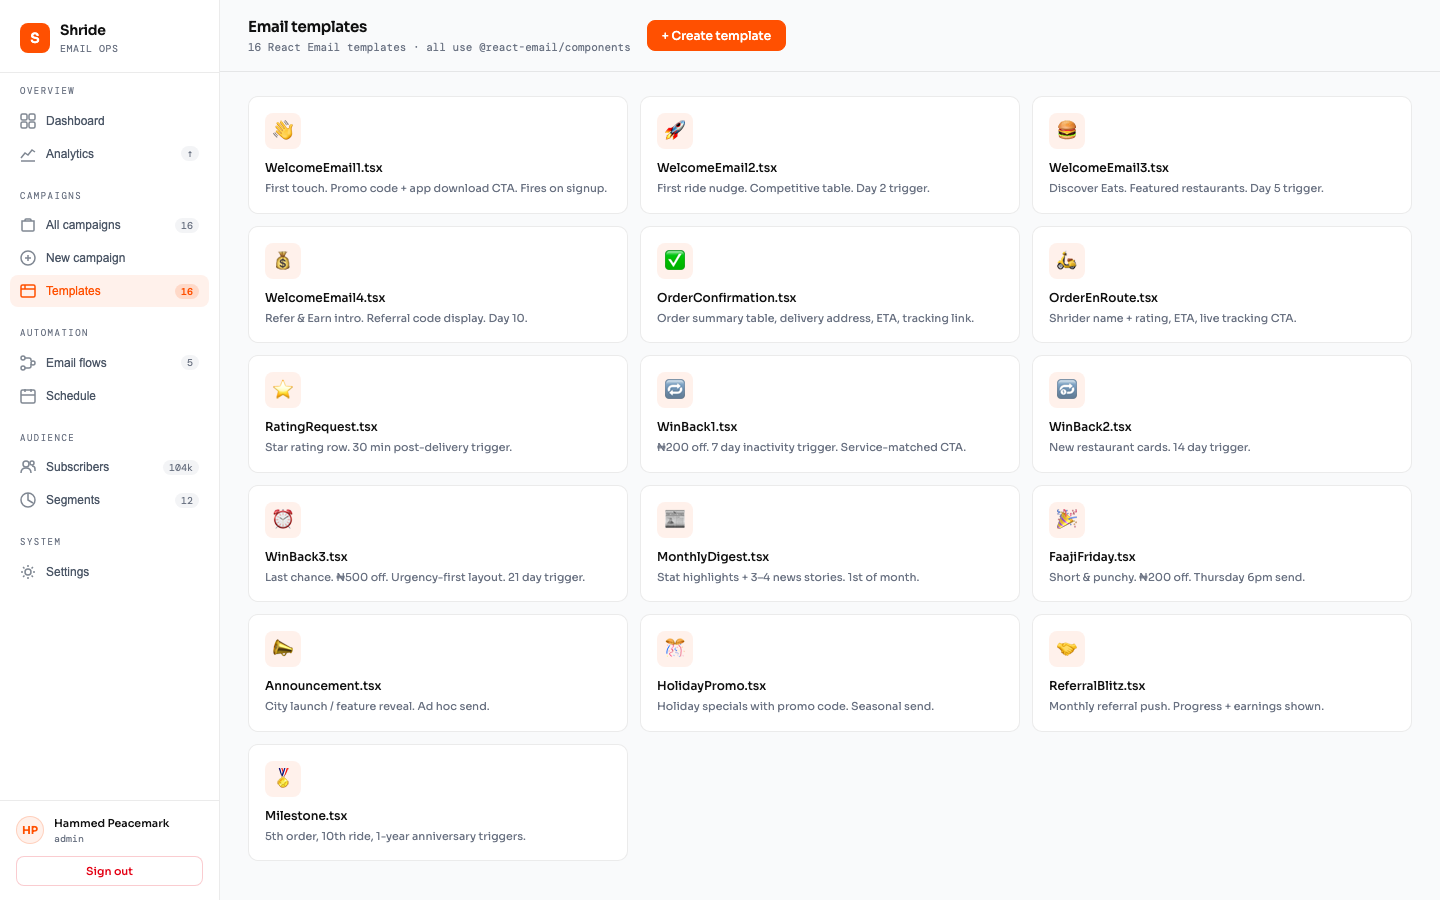
Go to Templates in the sidebar. You'll see all 16 built-in templates organized by domain.
Built-in Templates
| Template | When It Sends |
|---|---|
| WelcomeEmail1 | Immediately on signup |
| WelcomeEmail2 | Day 2 (if no ride taken) |
| WelcomeEmail3 | Day 5 (if no Eats order) |
| WelcomeEmail4 | Day 10 (Refer & Earn) |
| OrderConfirmation | When order is placed |
| OrderEnRoute | When Rider picks up order |
| RatingRequest | 30 min after delivery |
| WinBack1 | 7 days inactive |
| WinBack2 | 14 days inactive |
| WinBack3 | 21 days inactive |
| MonthlyDigest | 1st of each month |
| FaajiFriday | Every Thursday 6pm WAT |
| Announcement | Manual (city launch, features) |
| HolidayPromo | Manual (Eid, Christmas, etc.) |
| ReferralBlitz | Monthly push |
| Milestone | 5th order, 10th ride, 1-year anniversary |
Editing a Template
5. Template Builder
Create custom email templates from scratch using the block-based builder.
Available Block Types
| Block | Use For |
|---|---|
| Heading | Section titles, hero text (small/medium/large) |
| Text | Body paragraphs, descriptions |
| Button | CTA buttons with links (styled in Sendly orange) |
| Image | Header images, product photos (paste URL) |
| Promo Code | Highlighted discount code with expiry |
| Divider | Horizontal line separator |
| Spacer | Vertical spacing (small/medium/large) |
6. Composing & Sending Emails
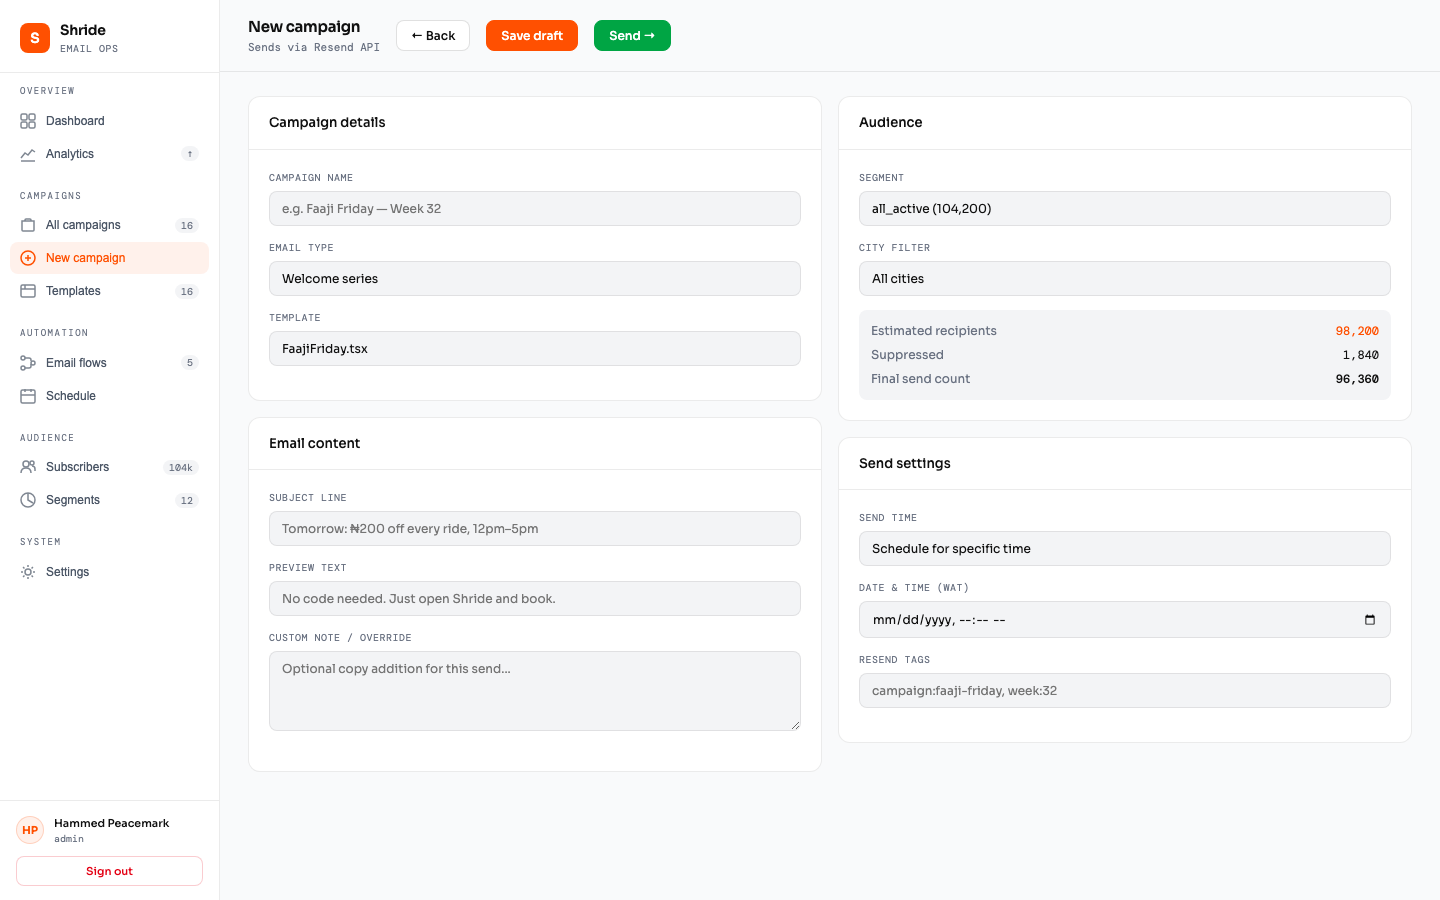
Go to New Campaign in the sidebar.
7. Automated Email Flows
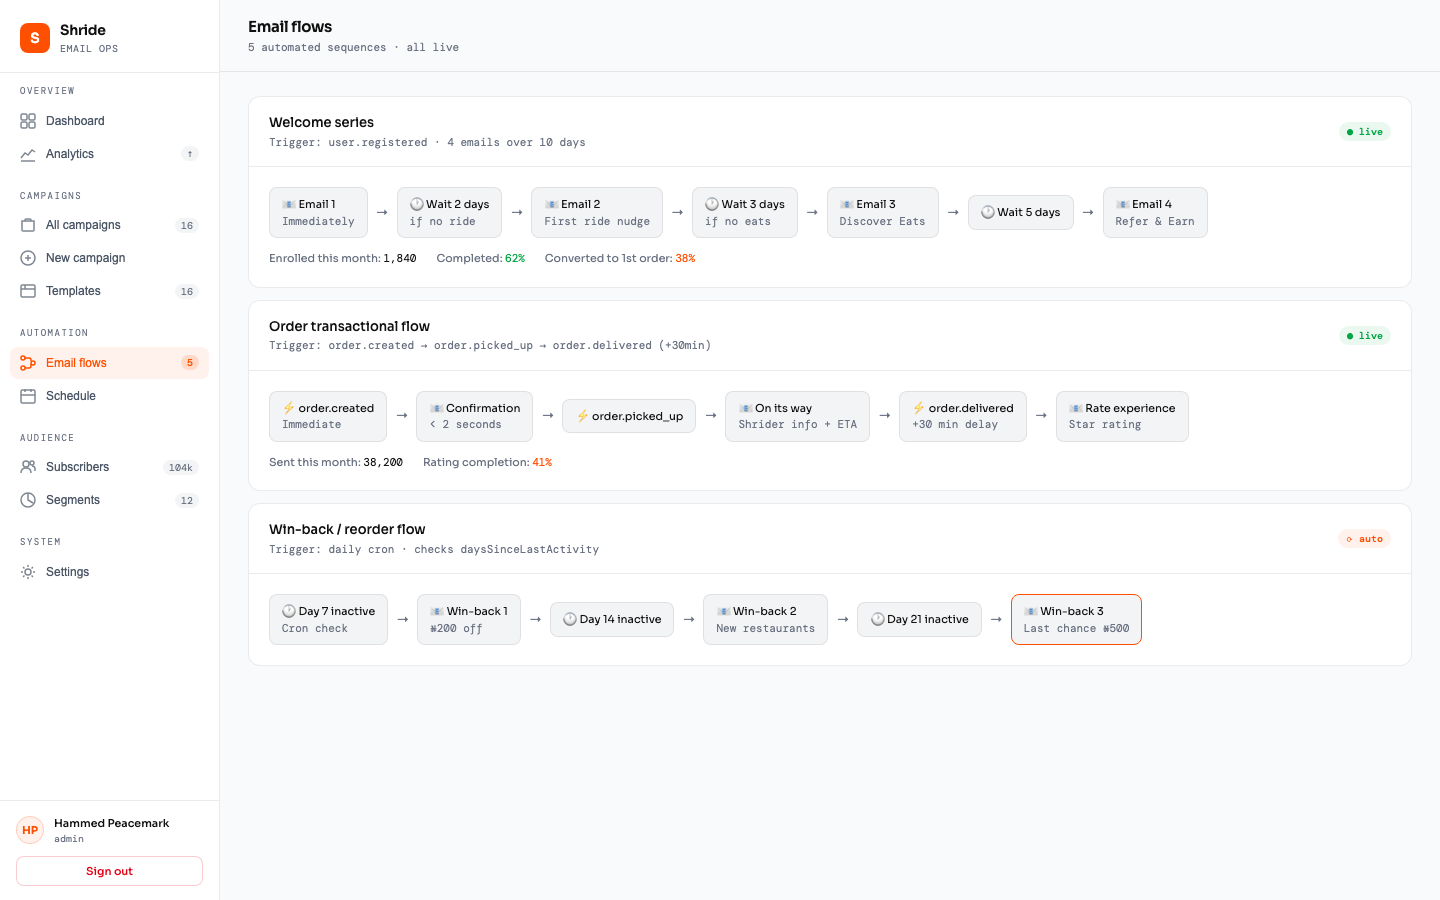
Go to Email Flows in the sidebar. These are automated sequences triggered by user actions.
Active Flows
Trigger: User registers → Email 1 immediately → Wait 2 days → Email 2 (if no ride) → Wait 3 days → Email 3 (if no Eats order) → Wait 5 days → Email 4 (Refer & Earn)
Trigger: Order created → Confirmation immediately → Picked up → En Route email → Delivered → 30 min delay → Rating Request
Daily at 6am WAT: scans for inactive users → 7 days → WinBack1 → 14 days → WinBack2 → 21 days → WinBack3 (last chance)
Every Thursday at 6pm WAT: sends to all active subscribers reminding them of Friday discounts.
1st of each month at 9am WAT: sends monthly roundup with stats and stories.
8. Subscribers & CSV Import
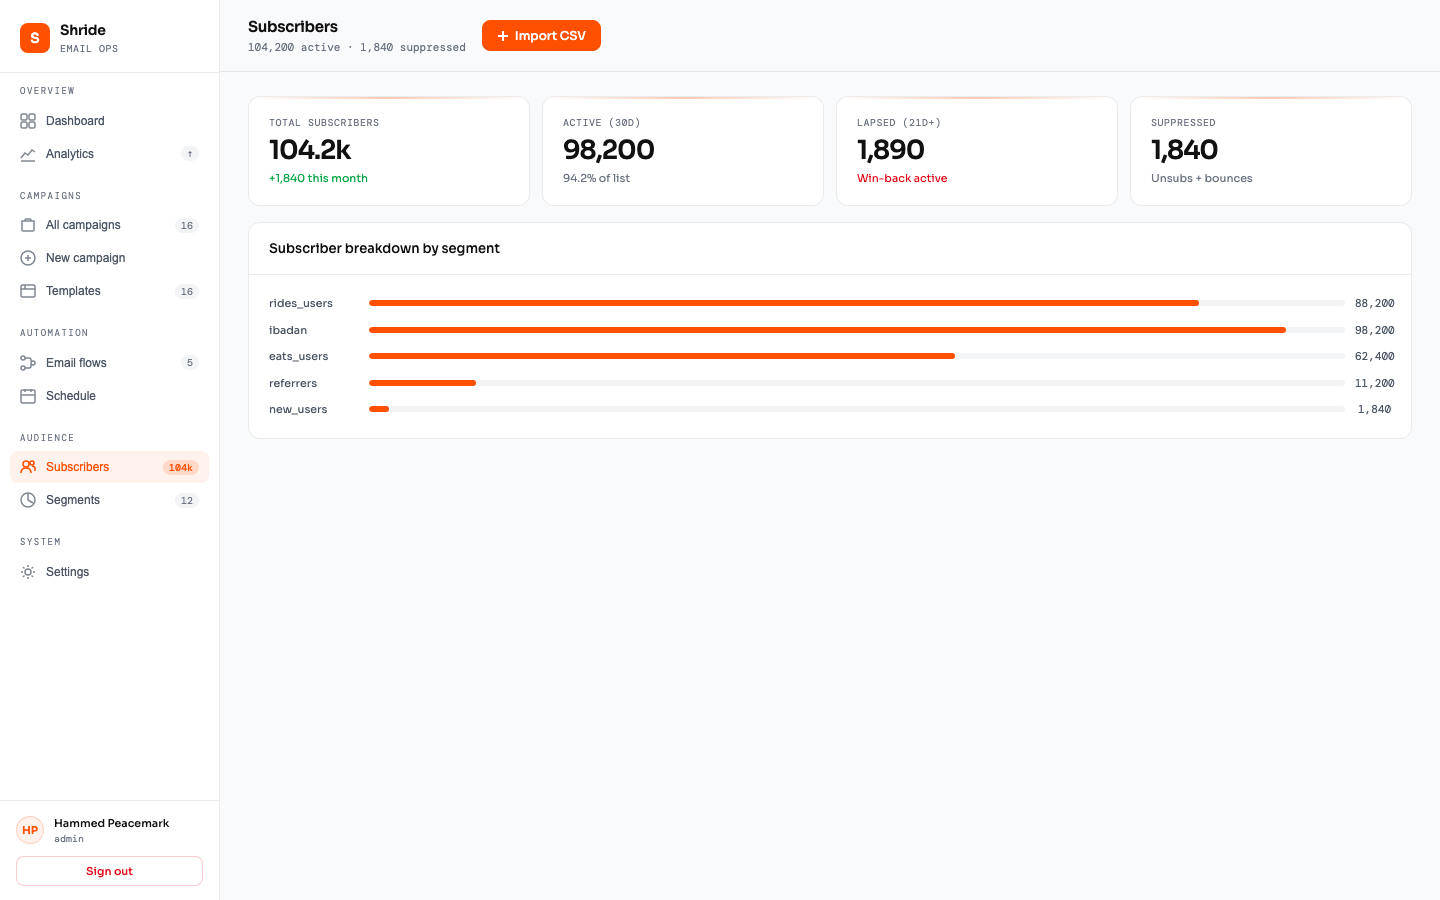
Go to Subscribers in the sidebar to manage your email audience.
Importing Subscribers via CSV
email column. Optional columns: name, user_id.CSV Format Example
email,name,user_id
tunde@example.com,Tunde Adeyemi,usr_001
hammed@example.com,Hammed Peacemark,usr_002
aisha@example.com,Aisha Ibrahim,usr_003
9. Segmentation

Go to Segments in the sidebar. Segments are groups of users filtered by behavior or attributes.
Built-in Segments (from Sendly DB)
| Segment | Description |
|---|---|
all_active | Active in last 30 days |
new_users | Registered in last 14 days |
lapsed_7d | Inactive 7-13 days |
lapsed_14d | Inactive 14-20 days |
lapsed_21d | Inactive 21+ days |
eats_users | At least 1 Eats order |
rides_users | At least 1 ride |
delivery_users | At least 1 delivery |
ibadan | City: Ibadan |
referrers | Has referred other users |
Creating Custom Segments
Custom segments can be created from imported subscribers by assigning them a segment name via the API or during import.
10. A/B Subject Testing
Test two subject line variants to find which gets more opens.
How It Works
11. Analytics & Metrics
Go to Analytics in the sidebar for detailed performance data.
Key Terms
| Term | Definition |
|---|---|
| Sent | Email accepted by Resend for delivery |
| Delivered | Email reached the recipient's mail server |
| Opened | Recipient opened the email (tracked via pixel) |
| Clicked | Recipient clicked a link in the email |
| Bounced | Email rejected by recipient's server (bad address, full inbox) |
| Complained | Recipient marked email as spam |
Real-time Updates
The dashboard supports WebSocket for real-time metric updates. Counters update live as emails are sent and opened.
CSV Export
Download campaign metrics, email logs, and suppression lists as CSV files from the Analytics page or via the API:
GET /api/exports/campaigns     — Campaign metrics
GET /api/exports/email-log     — Send history
GET /api/exports/suppression   — Blocked addresses
12. Database Settings

Go to Settings in the sidebar to configure database connections.
Two Environments
| Environment | Purpose | When to Use |
|---|---|---|
| Dev | Development / Staging database | Testing, building templates, QA |
| Production | Live Sendly database | Sending real emails to real users |
Two Databases Per Environment
| Database | Access | Purpose |
|---|---|---|
| Sendly DB | Read-only | User data, activity, segmentation |
| Email Service DB | Read-write | Email logs, metrics, suppression, templates |
Configuring a Database
13. Troubleshooting
Common Issues
| Problem | Cause | Fix |
|---|---|---|
| Can't log in | Email not in admin list | Only authorized emails can log in. Contact the system admin. |
| Magic link expired | Link is 15+ minutes old | Request a new magic link from the login page. |
| Dashboard shows mock data | No database connected | Go to Settings and configure your database connection. |
| Test email not received | Resend API key invalid | Check that the RESEND_API_KEY in .env is valid and the domain is verified. |
| High bounce rate alert | Bad email addresses in list | Review the suppression list. Clean your subscriber data. |
| Email images not loading | Images hosted externally | Ensure image URLs are accessible (https://) and under 100KB. |
| "Connection refused" errors | Database not reachable | Check database host, port, firewall rules. Use the Test button in Settings. |
| Emails going to spam | Sender reputation issue | Check complaint rate. Ensure hellosendly.com domain SPF/DKIM are configured. |
Health Check
Visit /health to see system status. A healthy system shows:
{
  "status": "ok",
  "checks": {
    "emailDb": { "status": "ok", "latency": 5 },
    "redis": { "status": "ok", "latency": 1 }
  }
}
14. API Reference
The email service exposes REST APIs for integration with the Sendly app.
Authentication
All API calls require either a session cookie (from dashboard login) or an X-API-Key header.
Event Endpoints (called by Sendly app)
| Method | Path | Description |
|---|---|---|
| POST | /events/user-registered | Trigger welcome series |
| POST | /events/order-created | Send order confirmation |
| POST | /events/order-picked-up | Send "on its way" email |
| POST | /events/order-delivered | Schedule rating request (30min) |
| POST | /events/ride-completed | Check for ride milestones |
| POST | /events/order-completed | Check for order milestones |
Dashboard API
| Method | Path | Description |
|---|---|---|
| GET | /api/dashboard/stats | Overview metrics |
| GET | /api/dashboard/campaigns | All campaigns with metrics |
| GET | /api/dashboard/health | Deliverability health signals |
| GET | /api/dashboard/funnel | Email funnel data |
| GET | /api/dashboard/schedule | Upcoming sends |
| GET | /api/dashboard/realtime | Live counters |
| GET | /api/dashboard/calendar | Campaign calendar |
| POST | /api/dashboard/send-test | Send test email |
Export Endpoints
| Method | Path | Returns |
|---|---|---|
| GET | /api/exports/campaigns | CSV of campaign metrics |
| GET | /api/exports/email-log | CSV of all email sends |
| GET | /api/exports/suppression | CSV of suppressed emails |
Multi-Language Support
Templates support 4 languages: English, Yoruba, Hausa, and Pidgin English. The system auto-detects language based on user city (Ibadan → Yoruba, Kano → Hausa).
Email Client Preview
Preview how emails render across clients: Gmail, Outlook (Windows), Apple Mail, and Yahoo Mail. Each client has different CSS support, and the preview simulates the differences.